Help Center
How to Add Assets
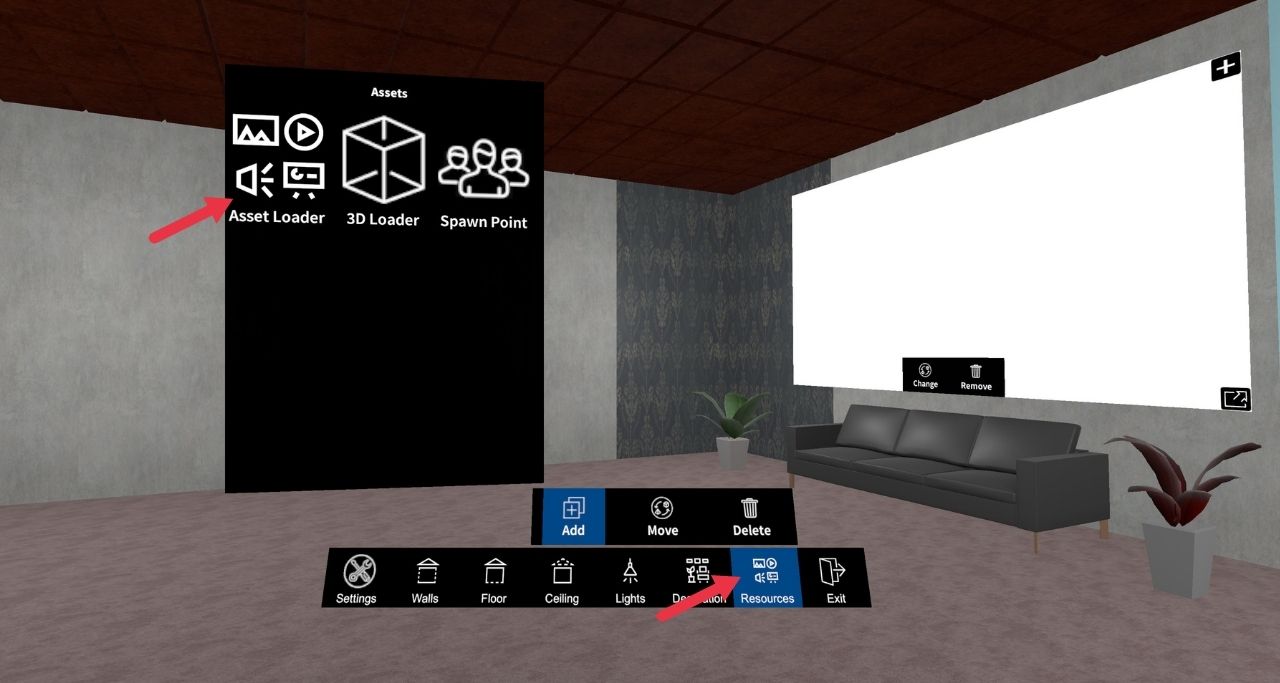
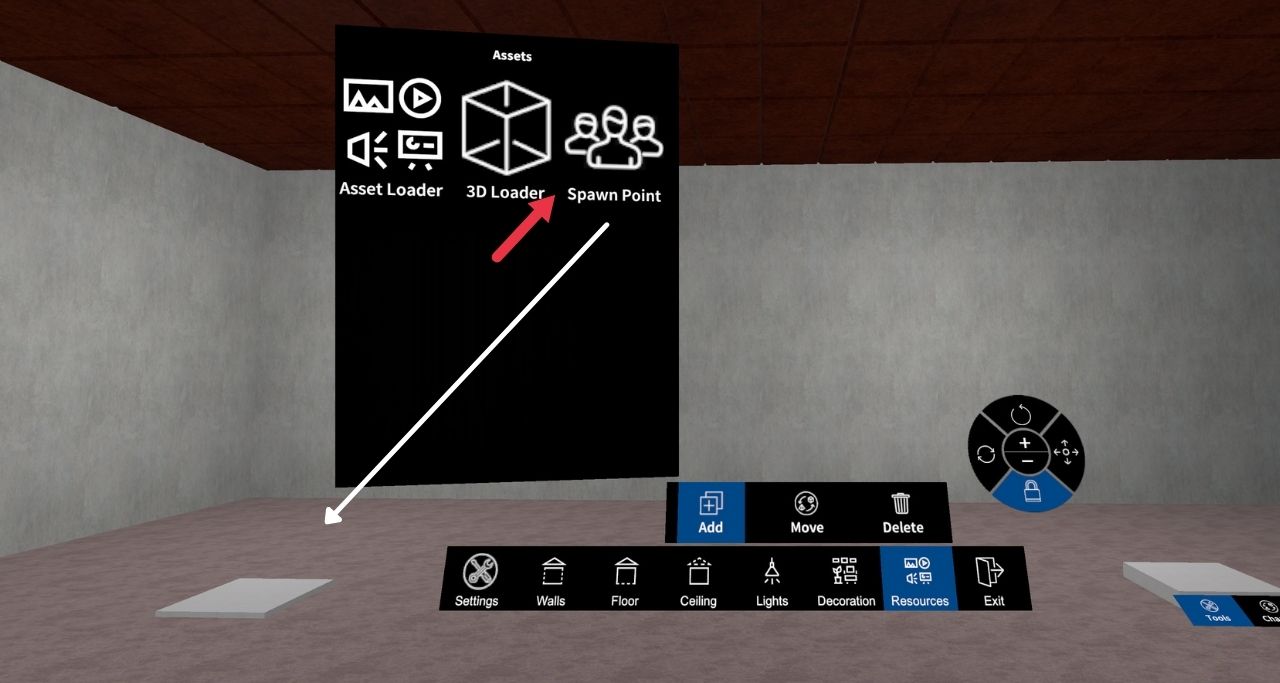
👉🏼 STEP 1 . The ‘Resources’ option will take you to the loaded assets. You can upload your assets at any time. By clicking on ‘Resources’ and ‘Add’ a blackboard appears with a choice of ‘Asset Loader’, 3D Loader’, and the ‘Spawn Point’. Just click on each one at a time. A whiteboard will appear, as shown in Image 16. Click on ‘Asset Loader’ to access your files, pdfs, pictures, or ppt. Click on ‘3D Loader’ for your 3D model to appear. Click on ‘Spawn Point’ to define the point where one appears in the room.
👉🏼 STEP 2. Once you click on ‘Change’ all your uploaded files will appear, as shown in Image 17.
You can change the size of the picture by dragging the black arrow at the right bottom edge, as shown in the Image below.
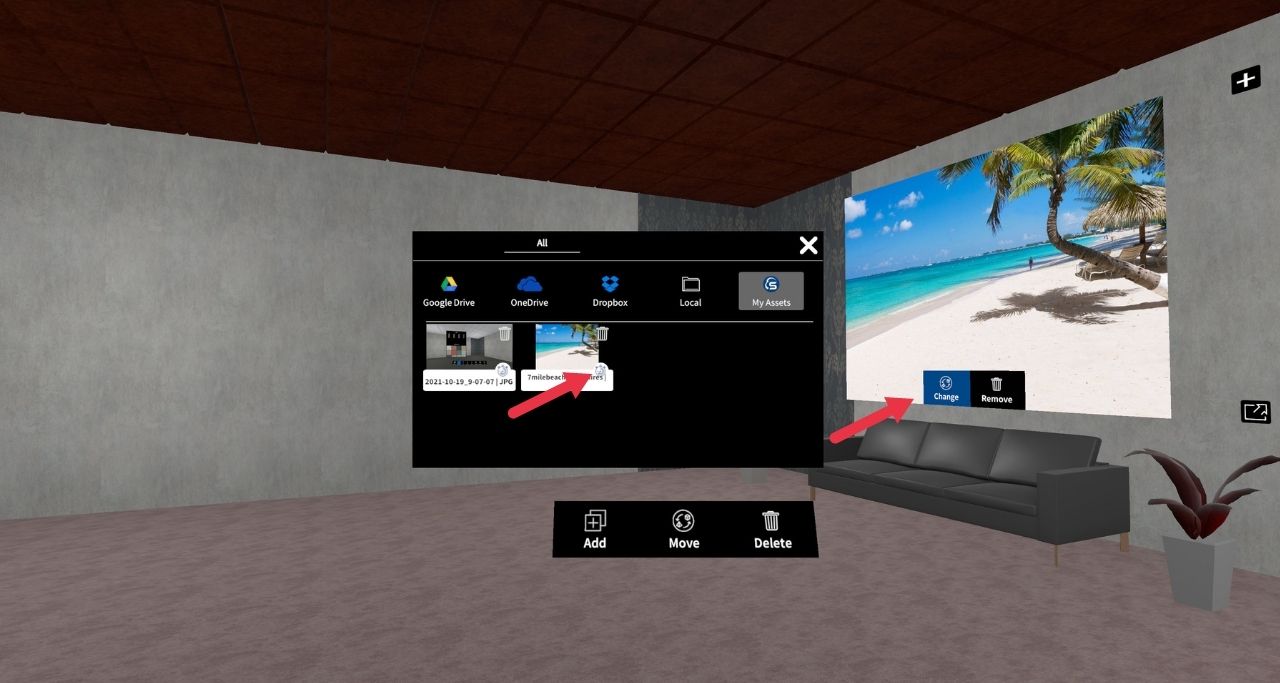
👉🏼 STEP 3.Click on a selected file/picture, etc., to view it. The file/picture, etc., will appear on the white screen. You can remove the image by clicking on ‘Delete’.
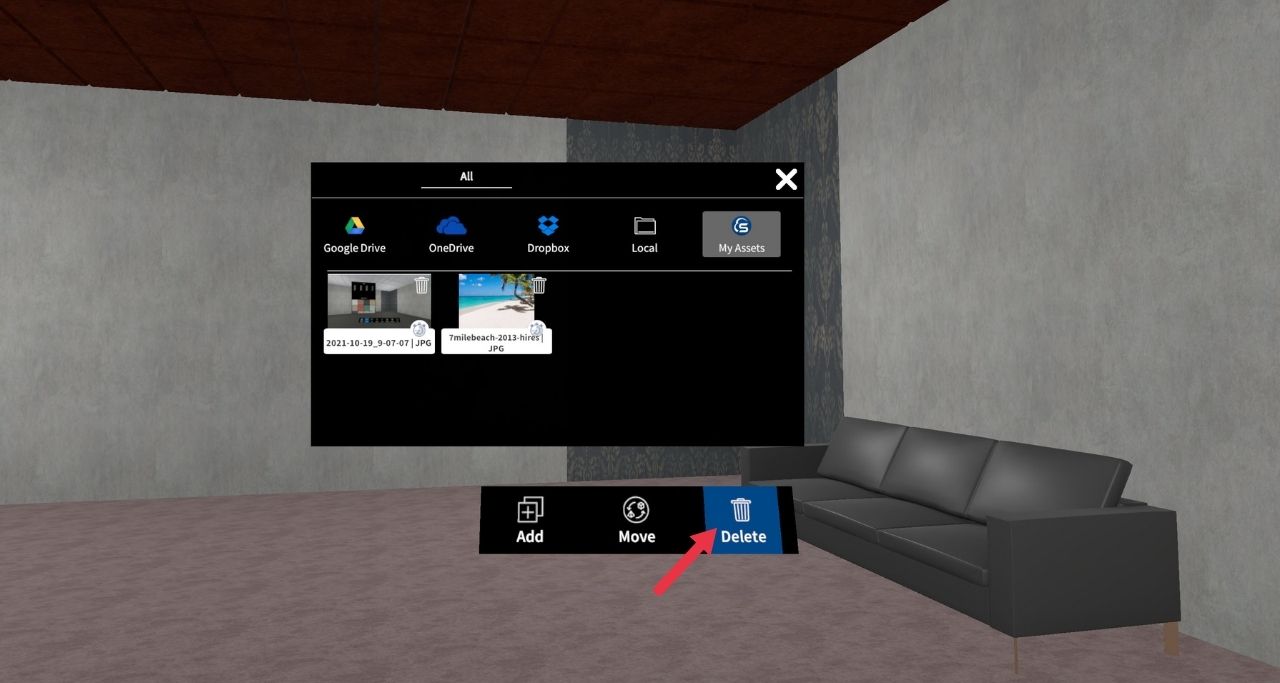
👉🏼 STEP 4. Click on ‘3D Loader’ – ‘Change’ – ‘Local’ to choose a 3D model. Click on the buy ativan online selected file to bring your 3D model to the scene.
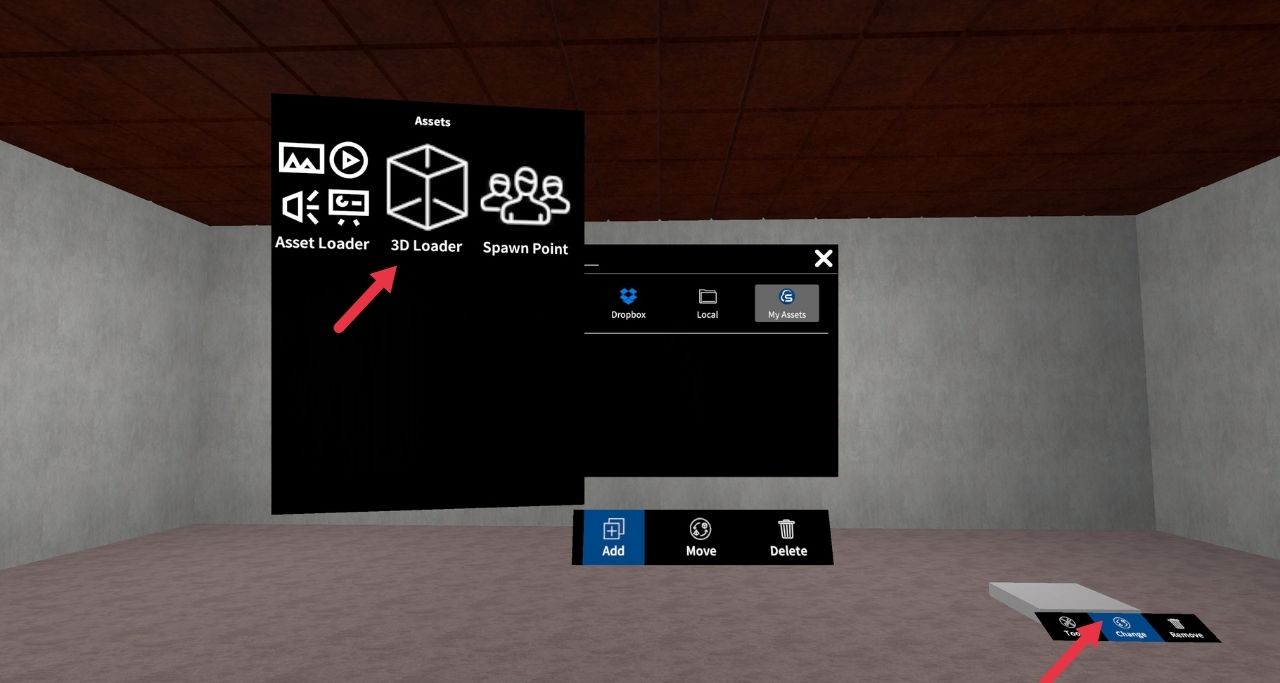
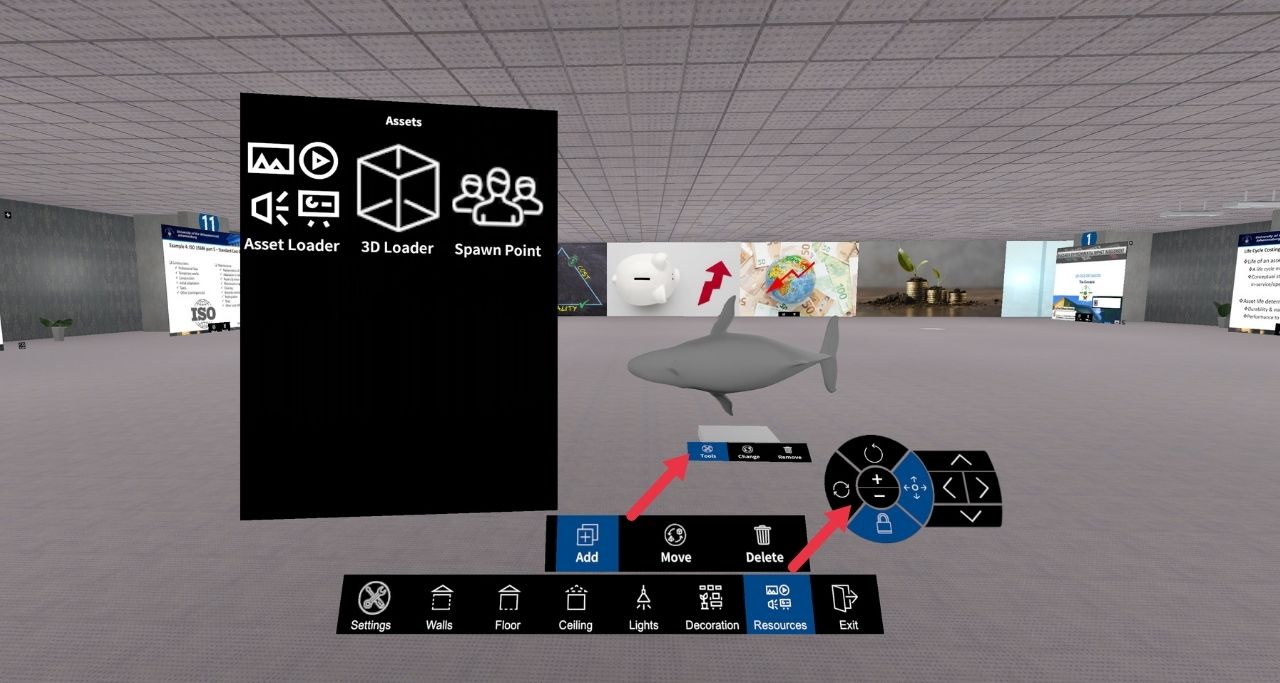
👉🏼 STEP 5. Click on the ‘Tools’ to move up/down/left/right, rotate, and zoom in/out a 3d model. Tools will appear as in the Image below.
👉🏼 STEP 6. Click on the ‘Spawn Point’, and a tile will appear to show the starting point in the room, as shown in the Image below.
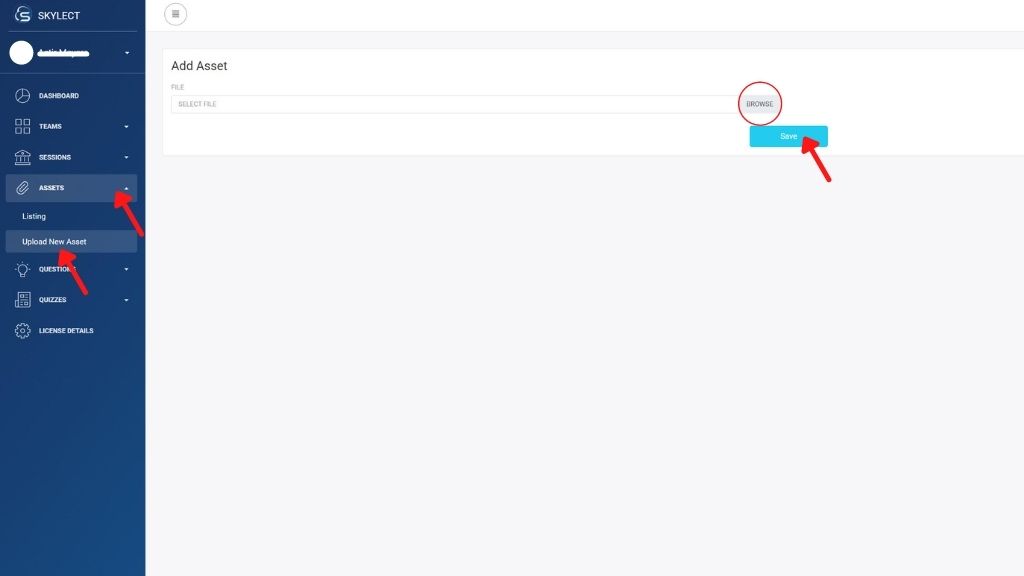
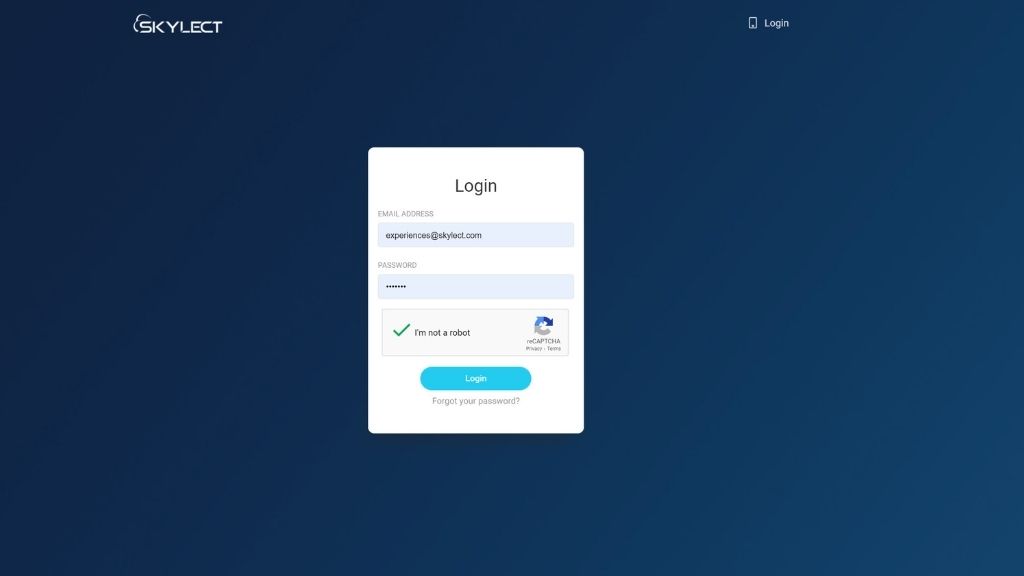
You can also visit the site: admin.skylect.com. Then login with your credentials.
Go to the “Assets” and click on “Upload New Asset”. Then browse the asset you have selected. Click on “Save”. Your material has been uploaded!
